What an ingenious title!
Anyway, this update regards the state of the floors – when I bought the car I thought it was fairly solid throughout, but as I dug further I began to find more and more problems, and one of the costliest and biggest parts of the restoration to date was the floor.
It’s seen better days! 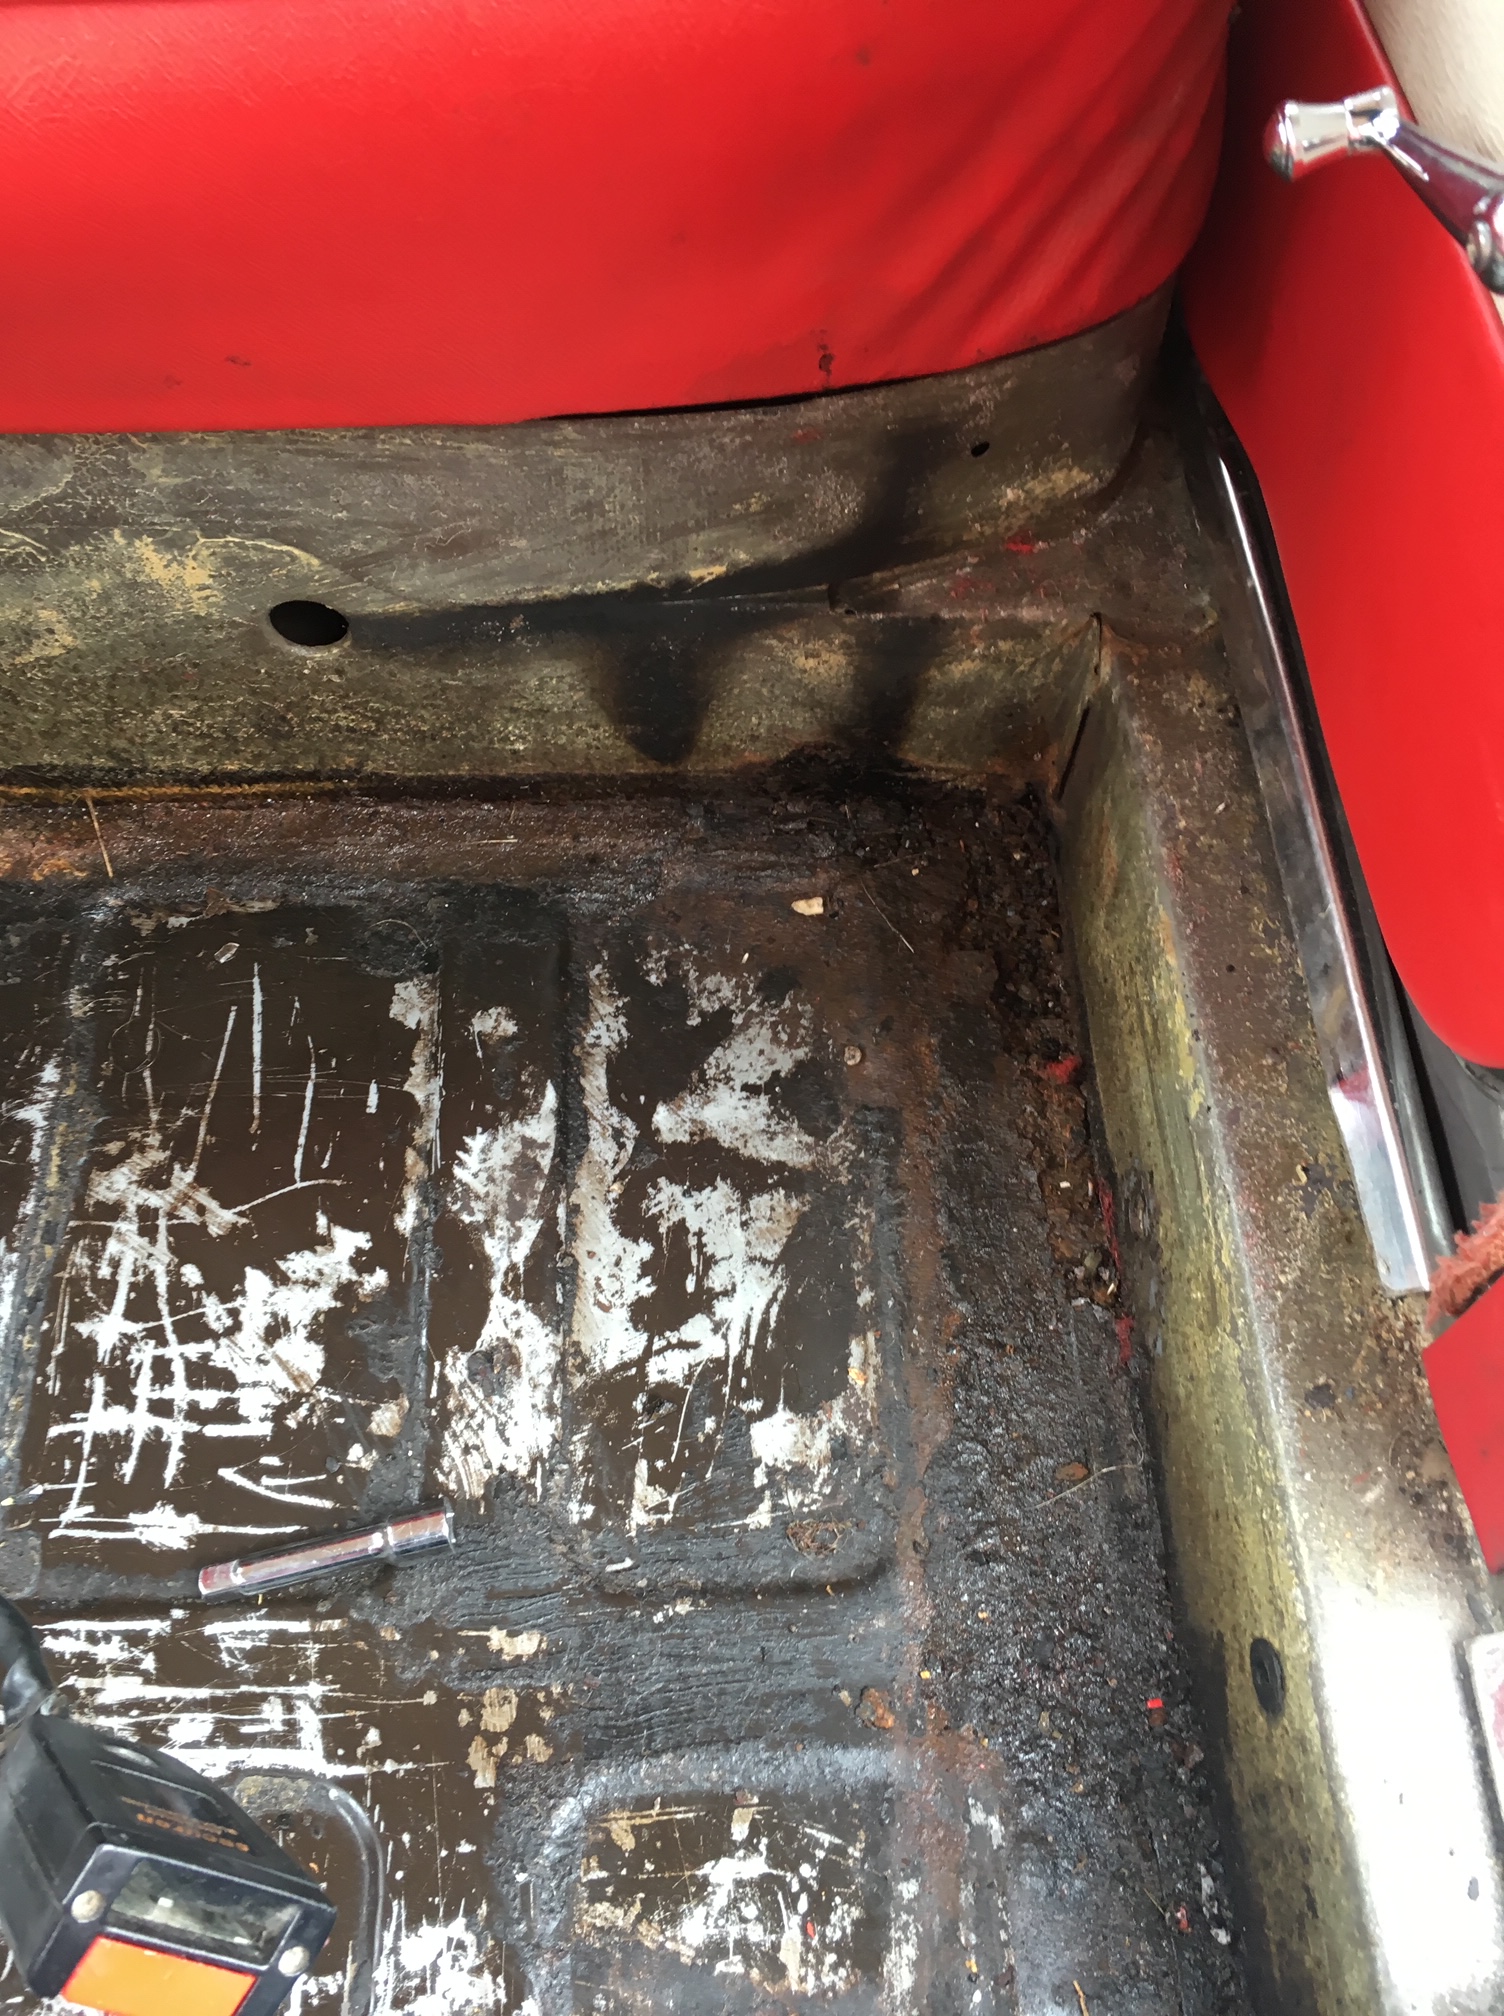
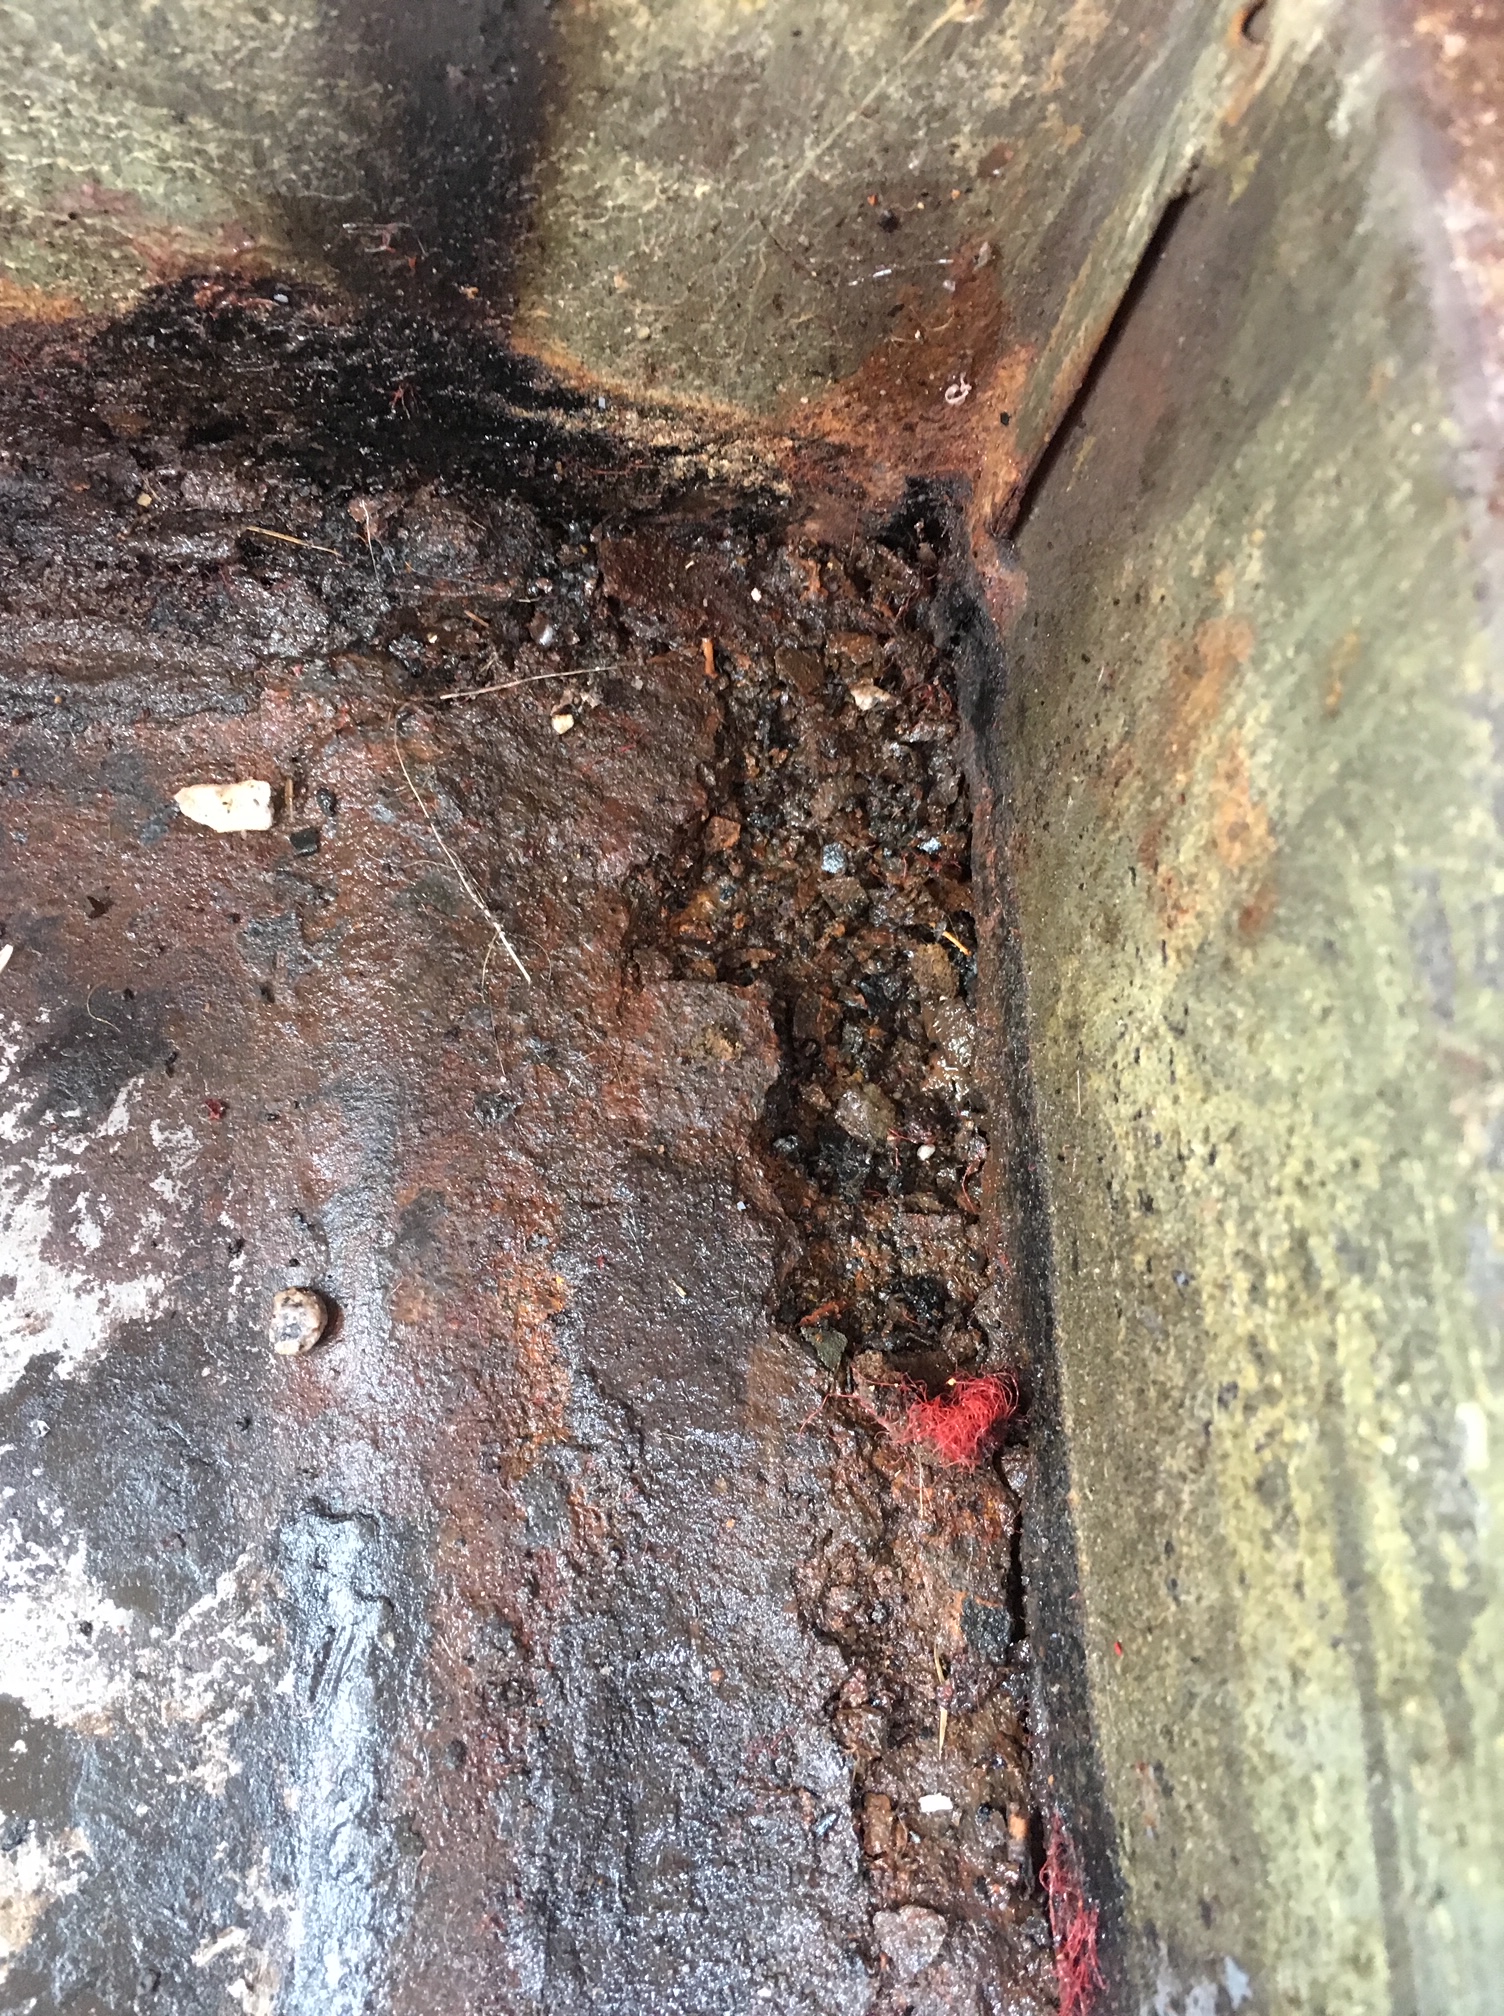
Crusty corners 
Stripping the old sound-deadening layer revealed some secrets! 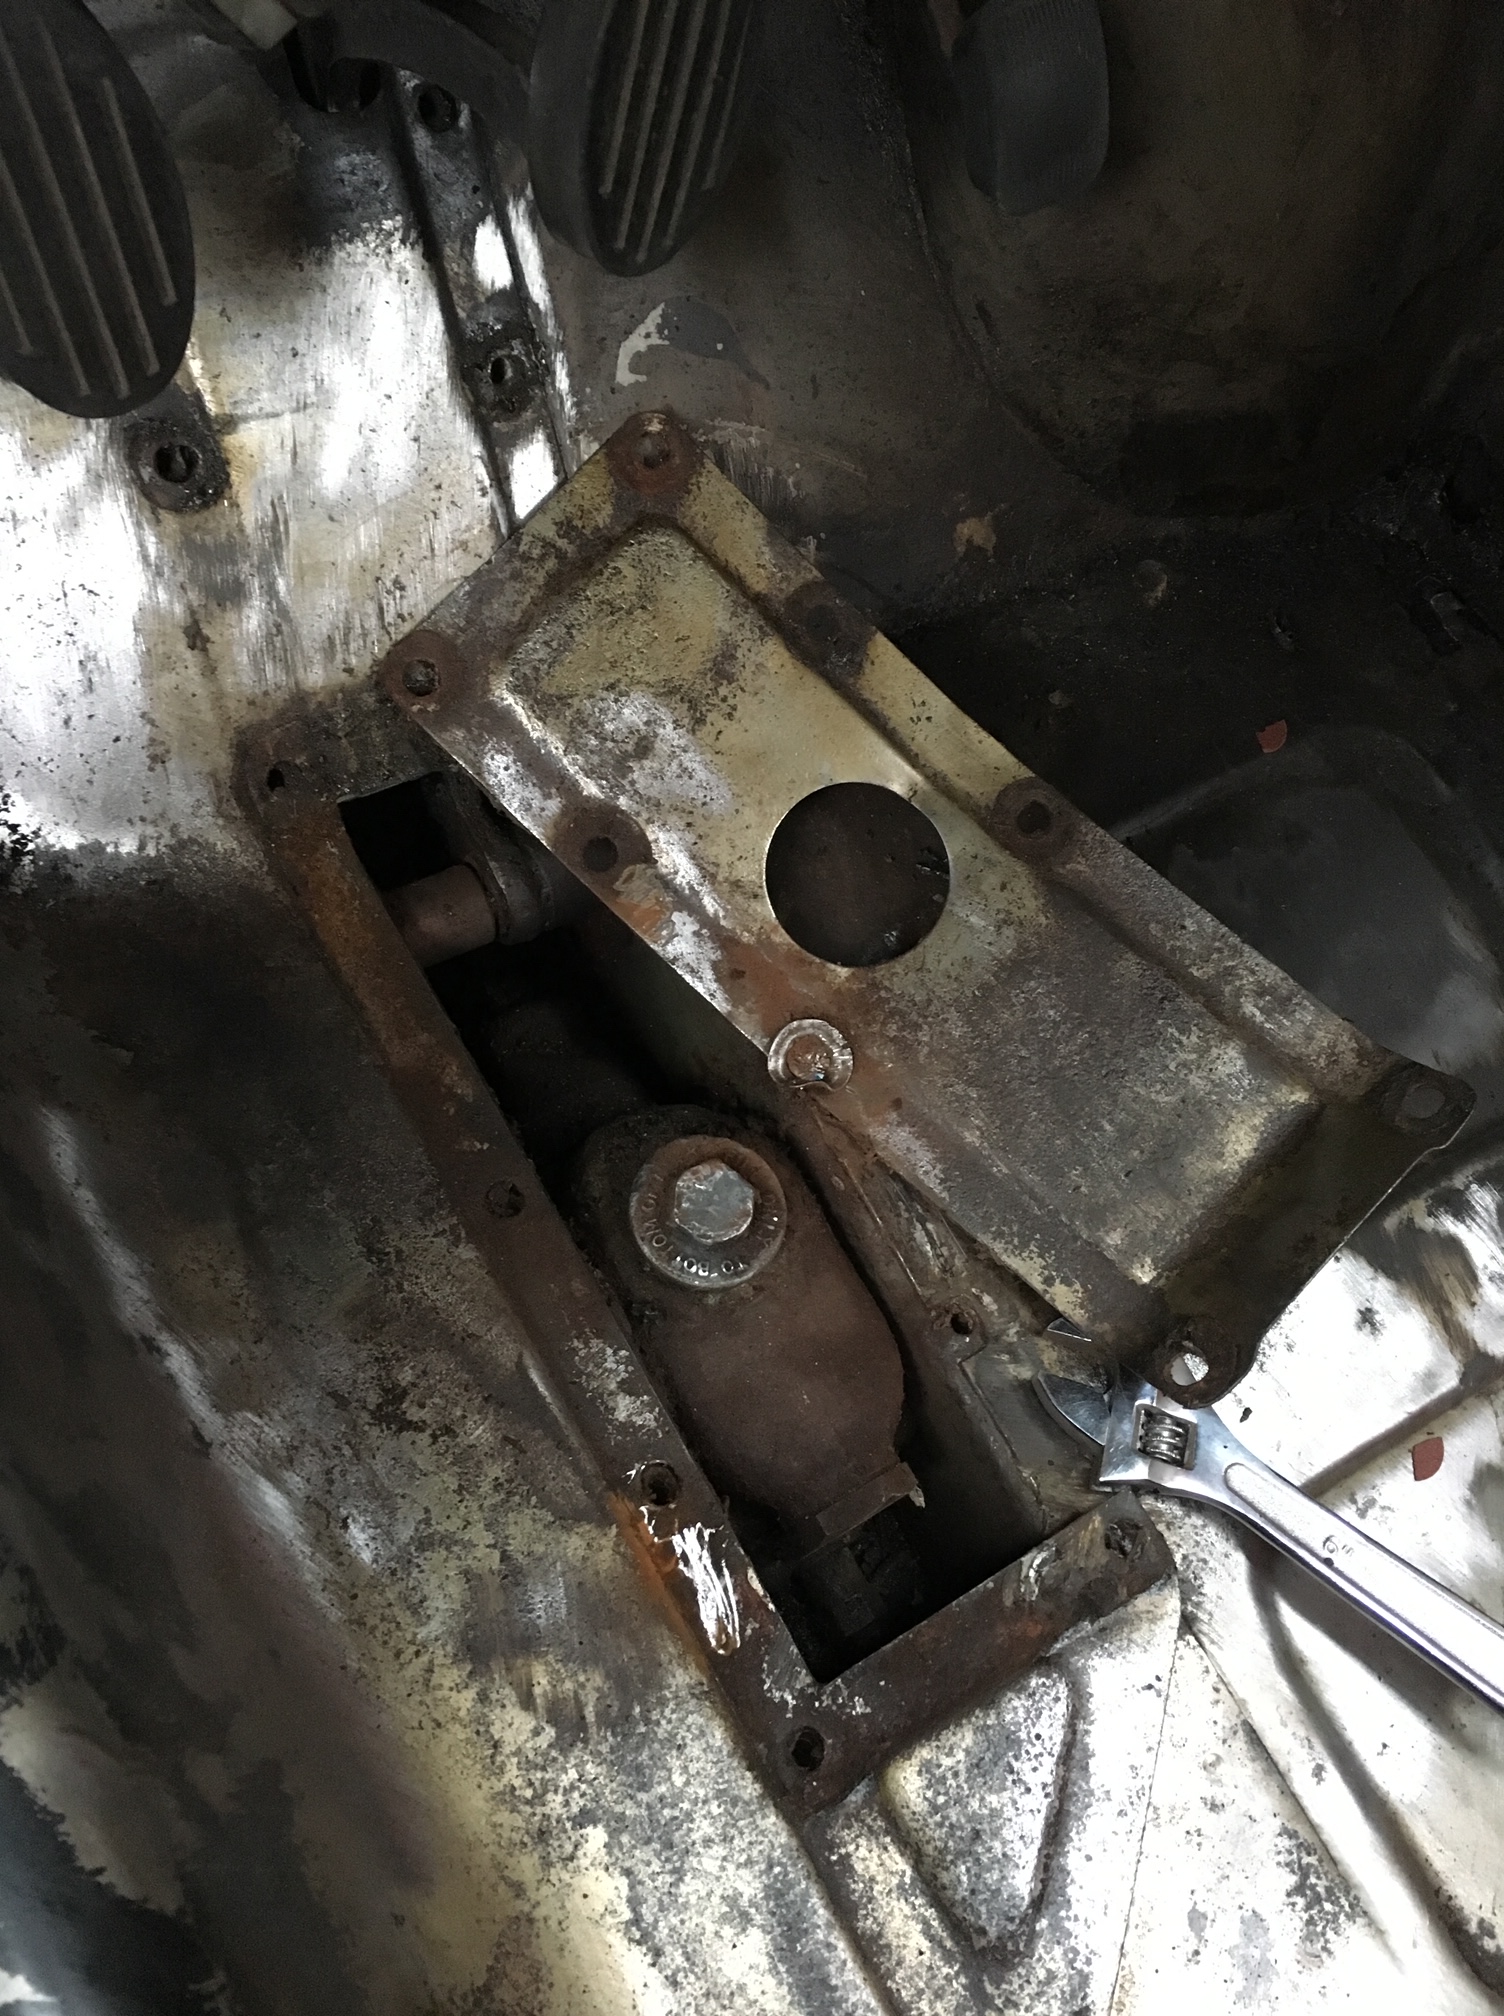
The master break cylinder. 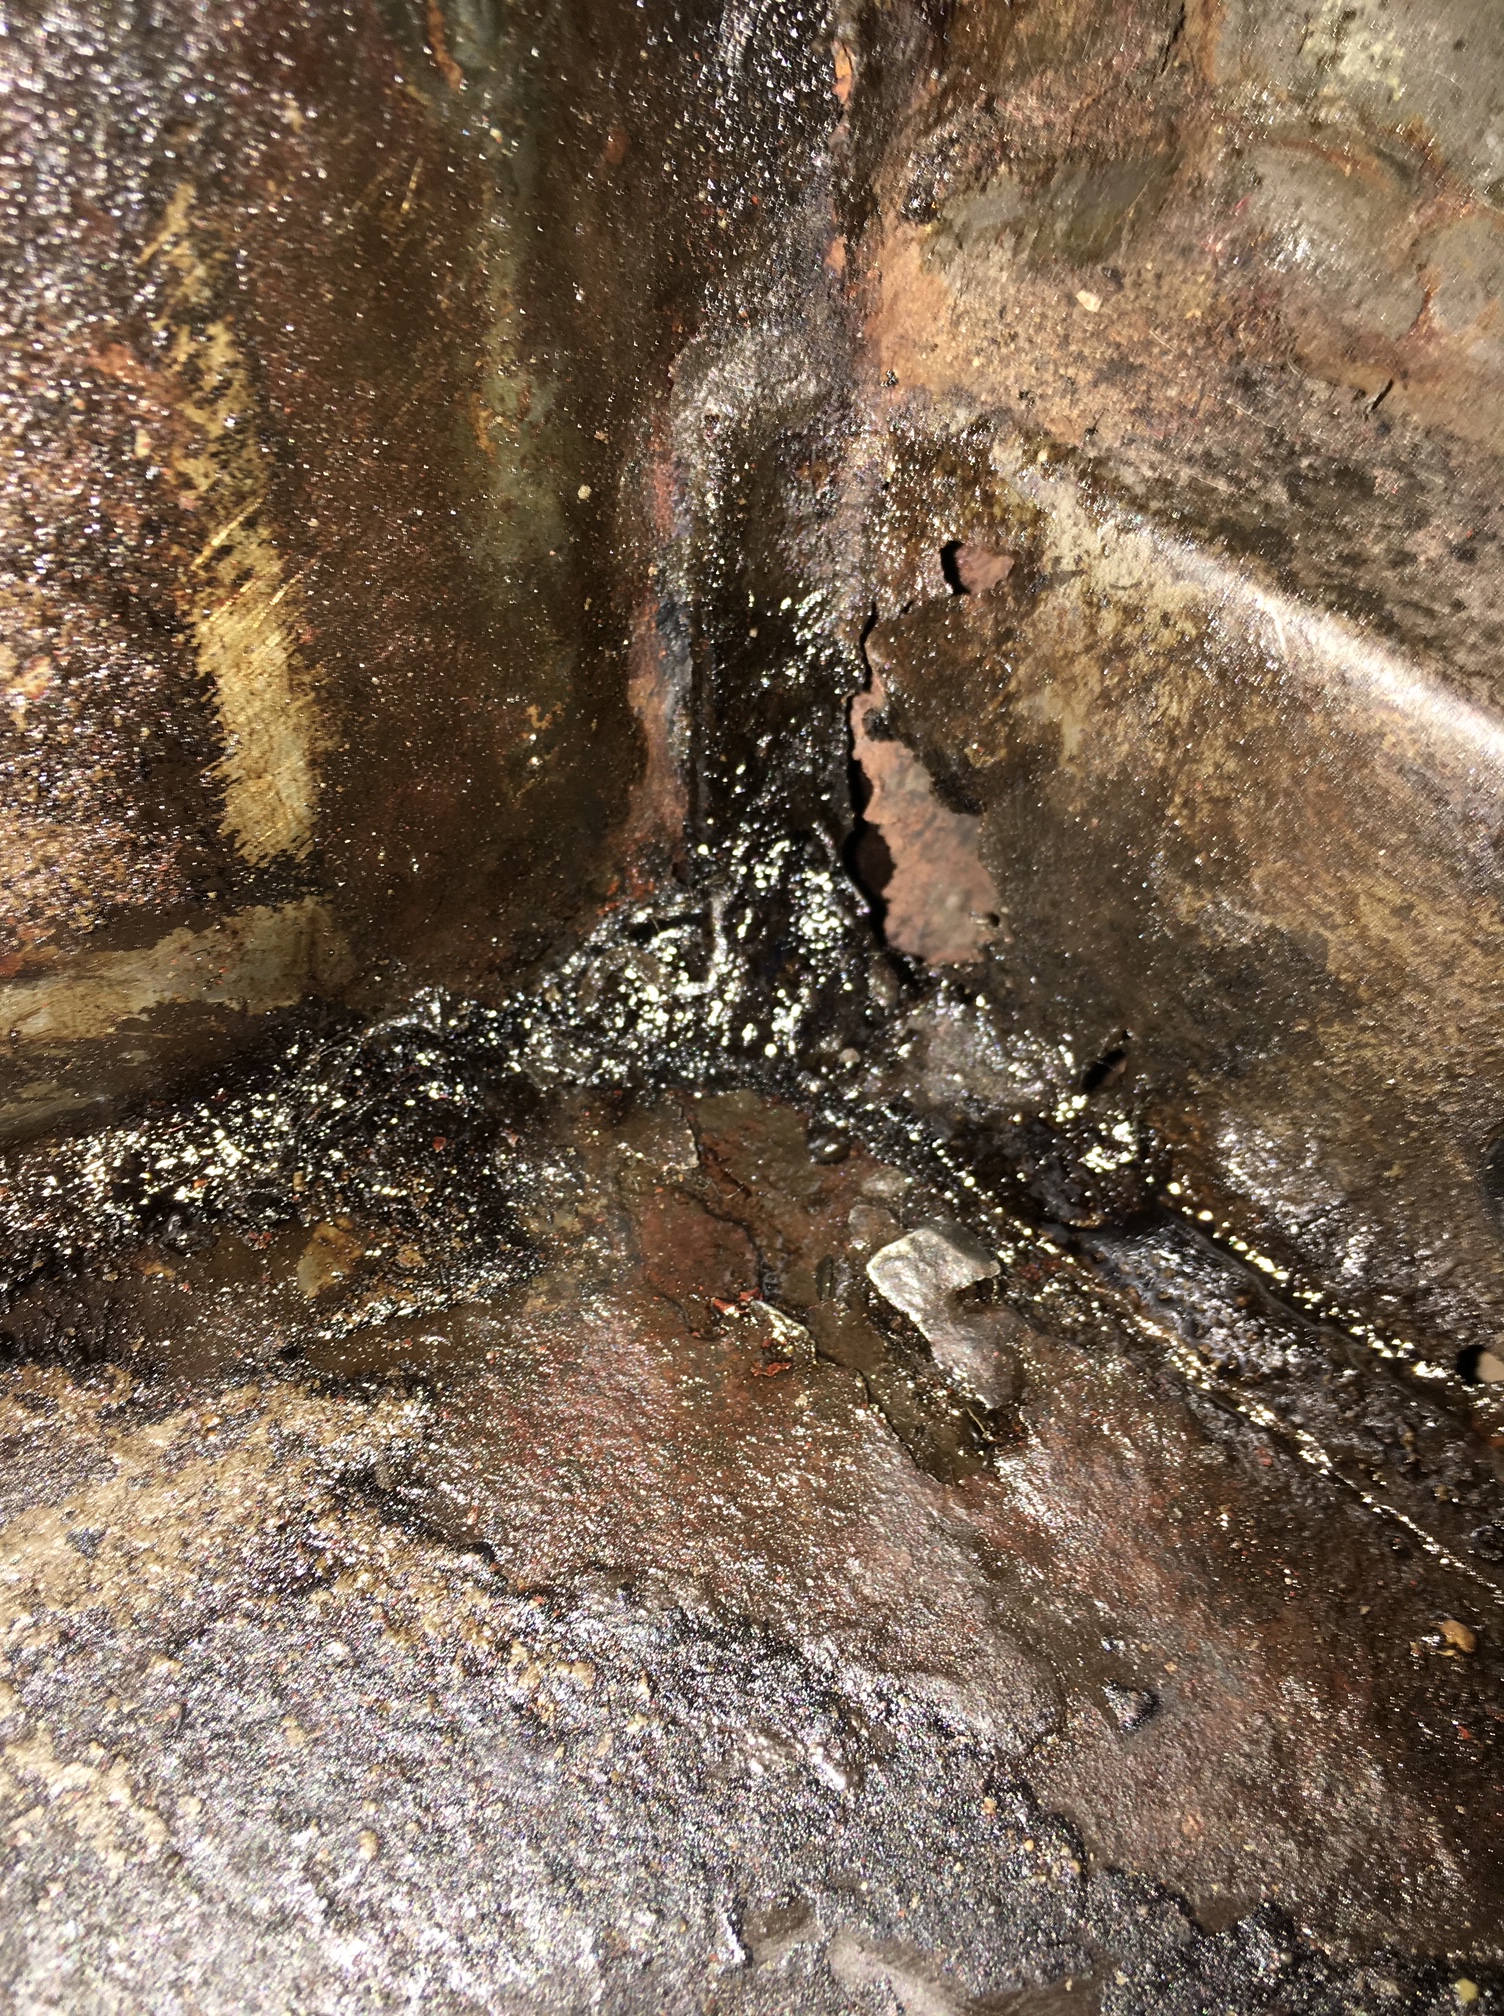
The corner near the front driver’s side wheel arch 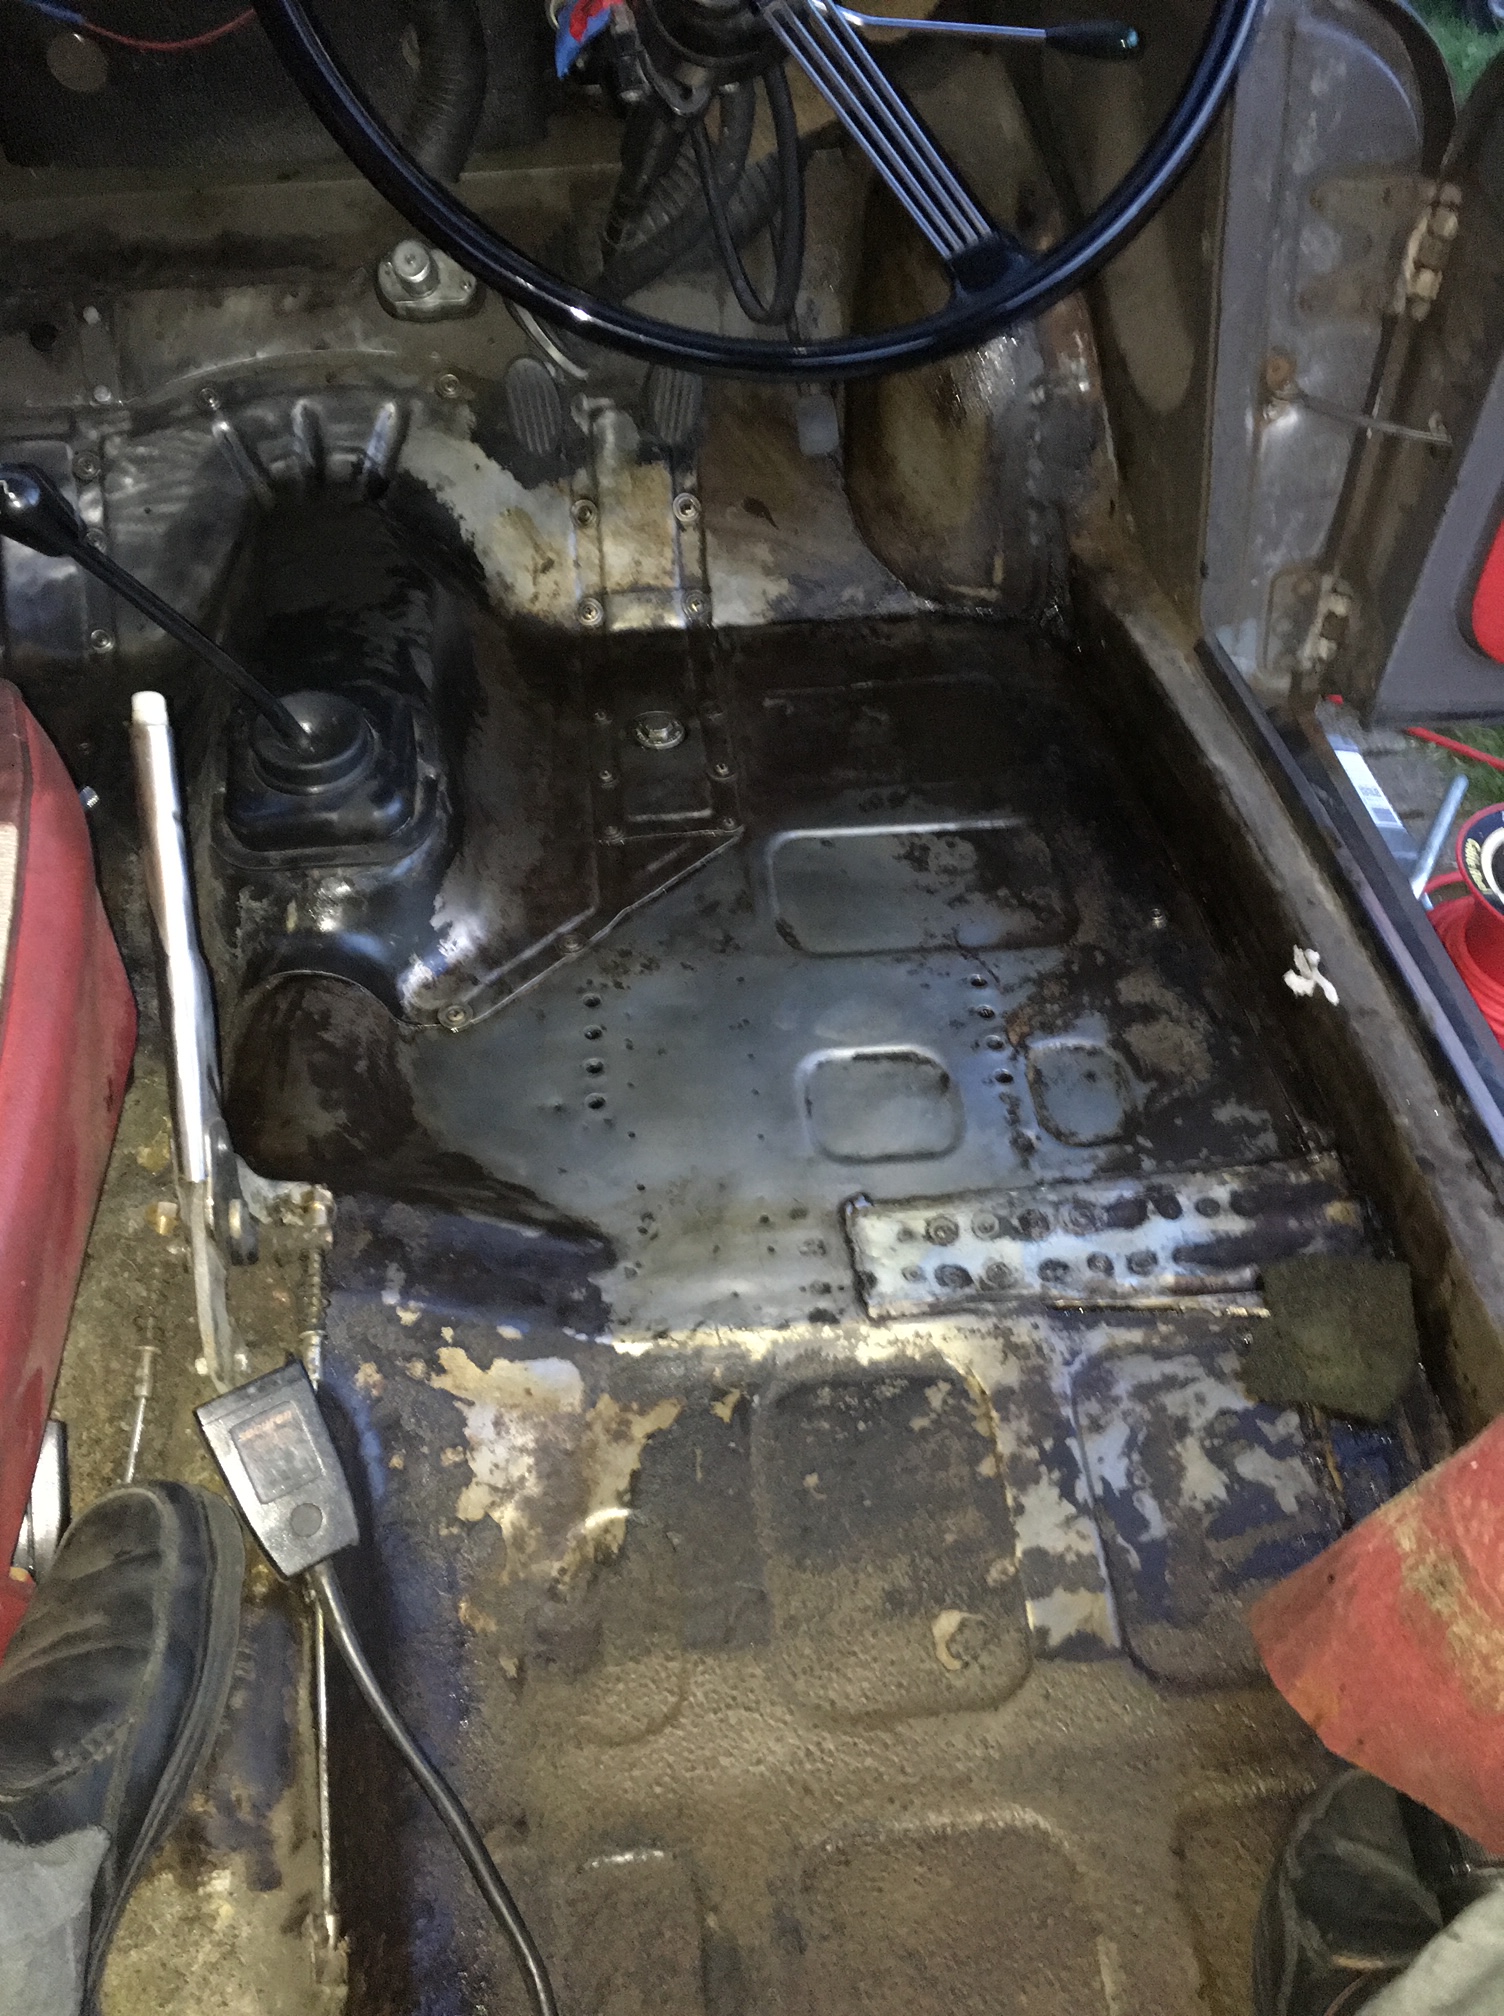
Driver’s side floor. 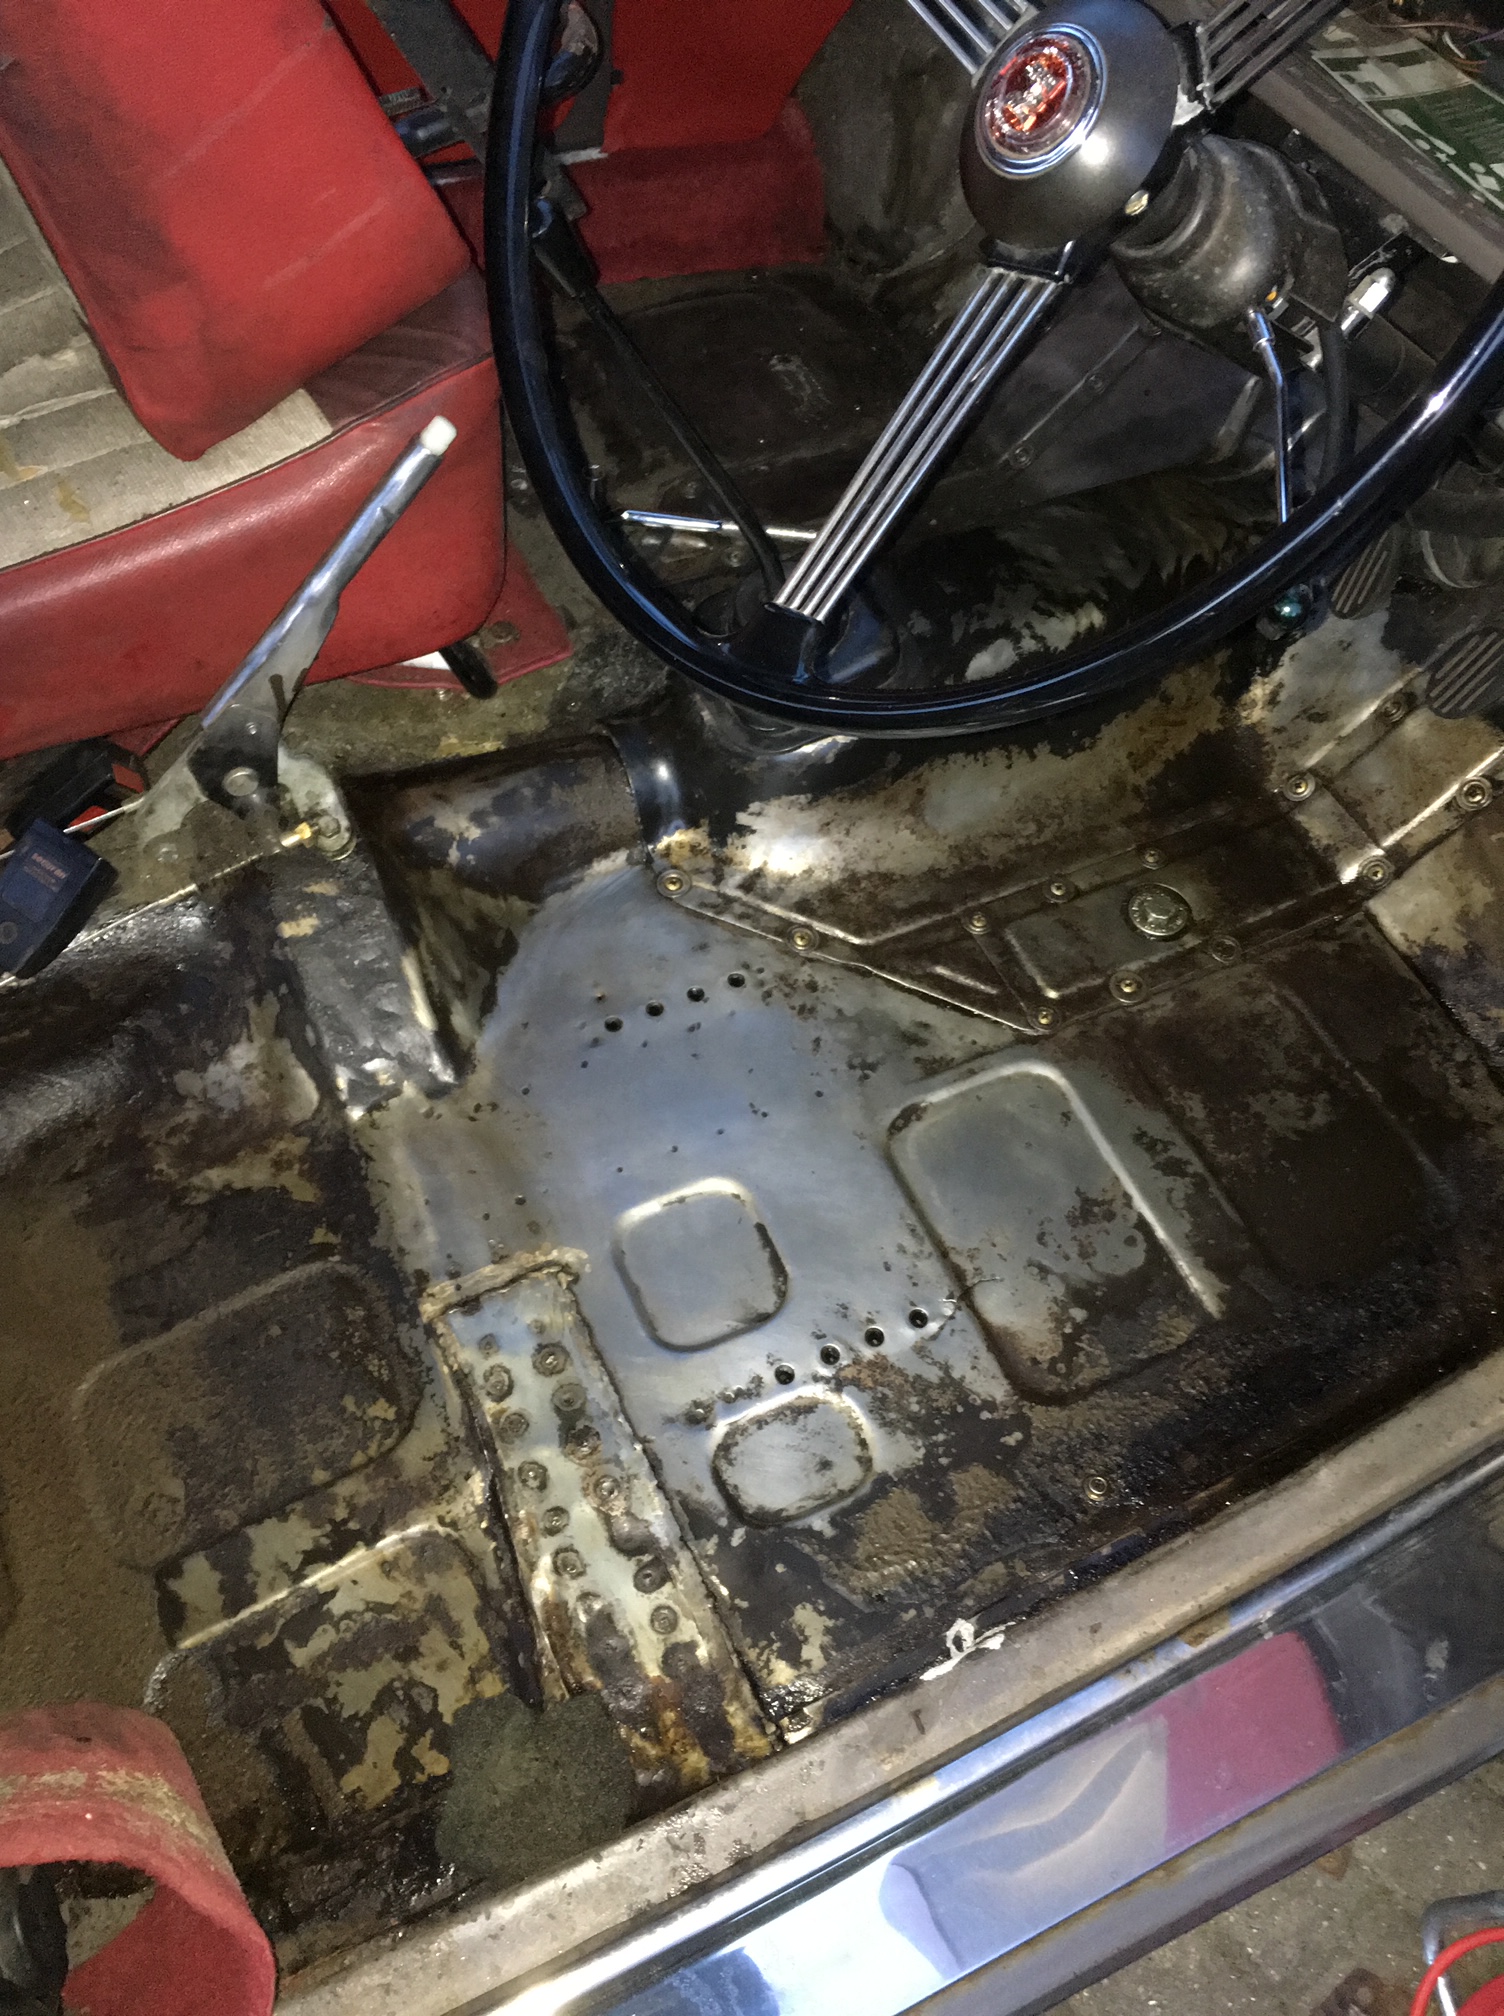
Drivers side floor. Note the previous repairs to the crossmember. 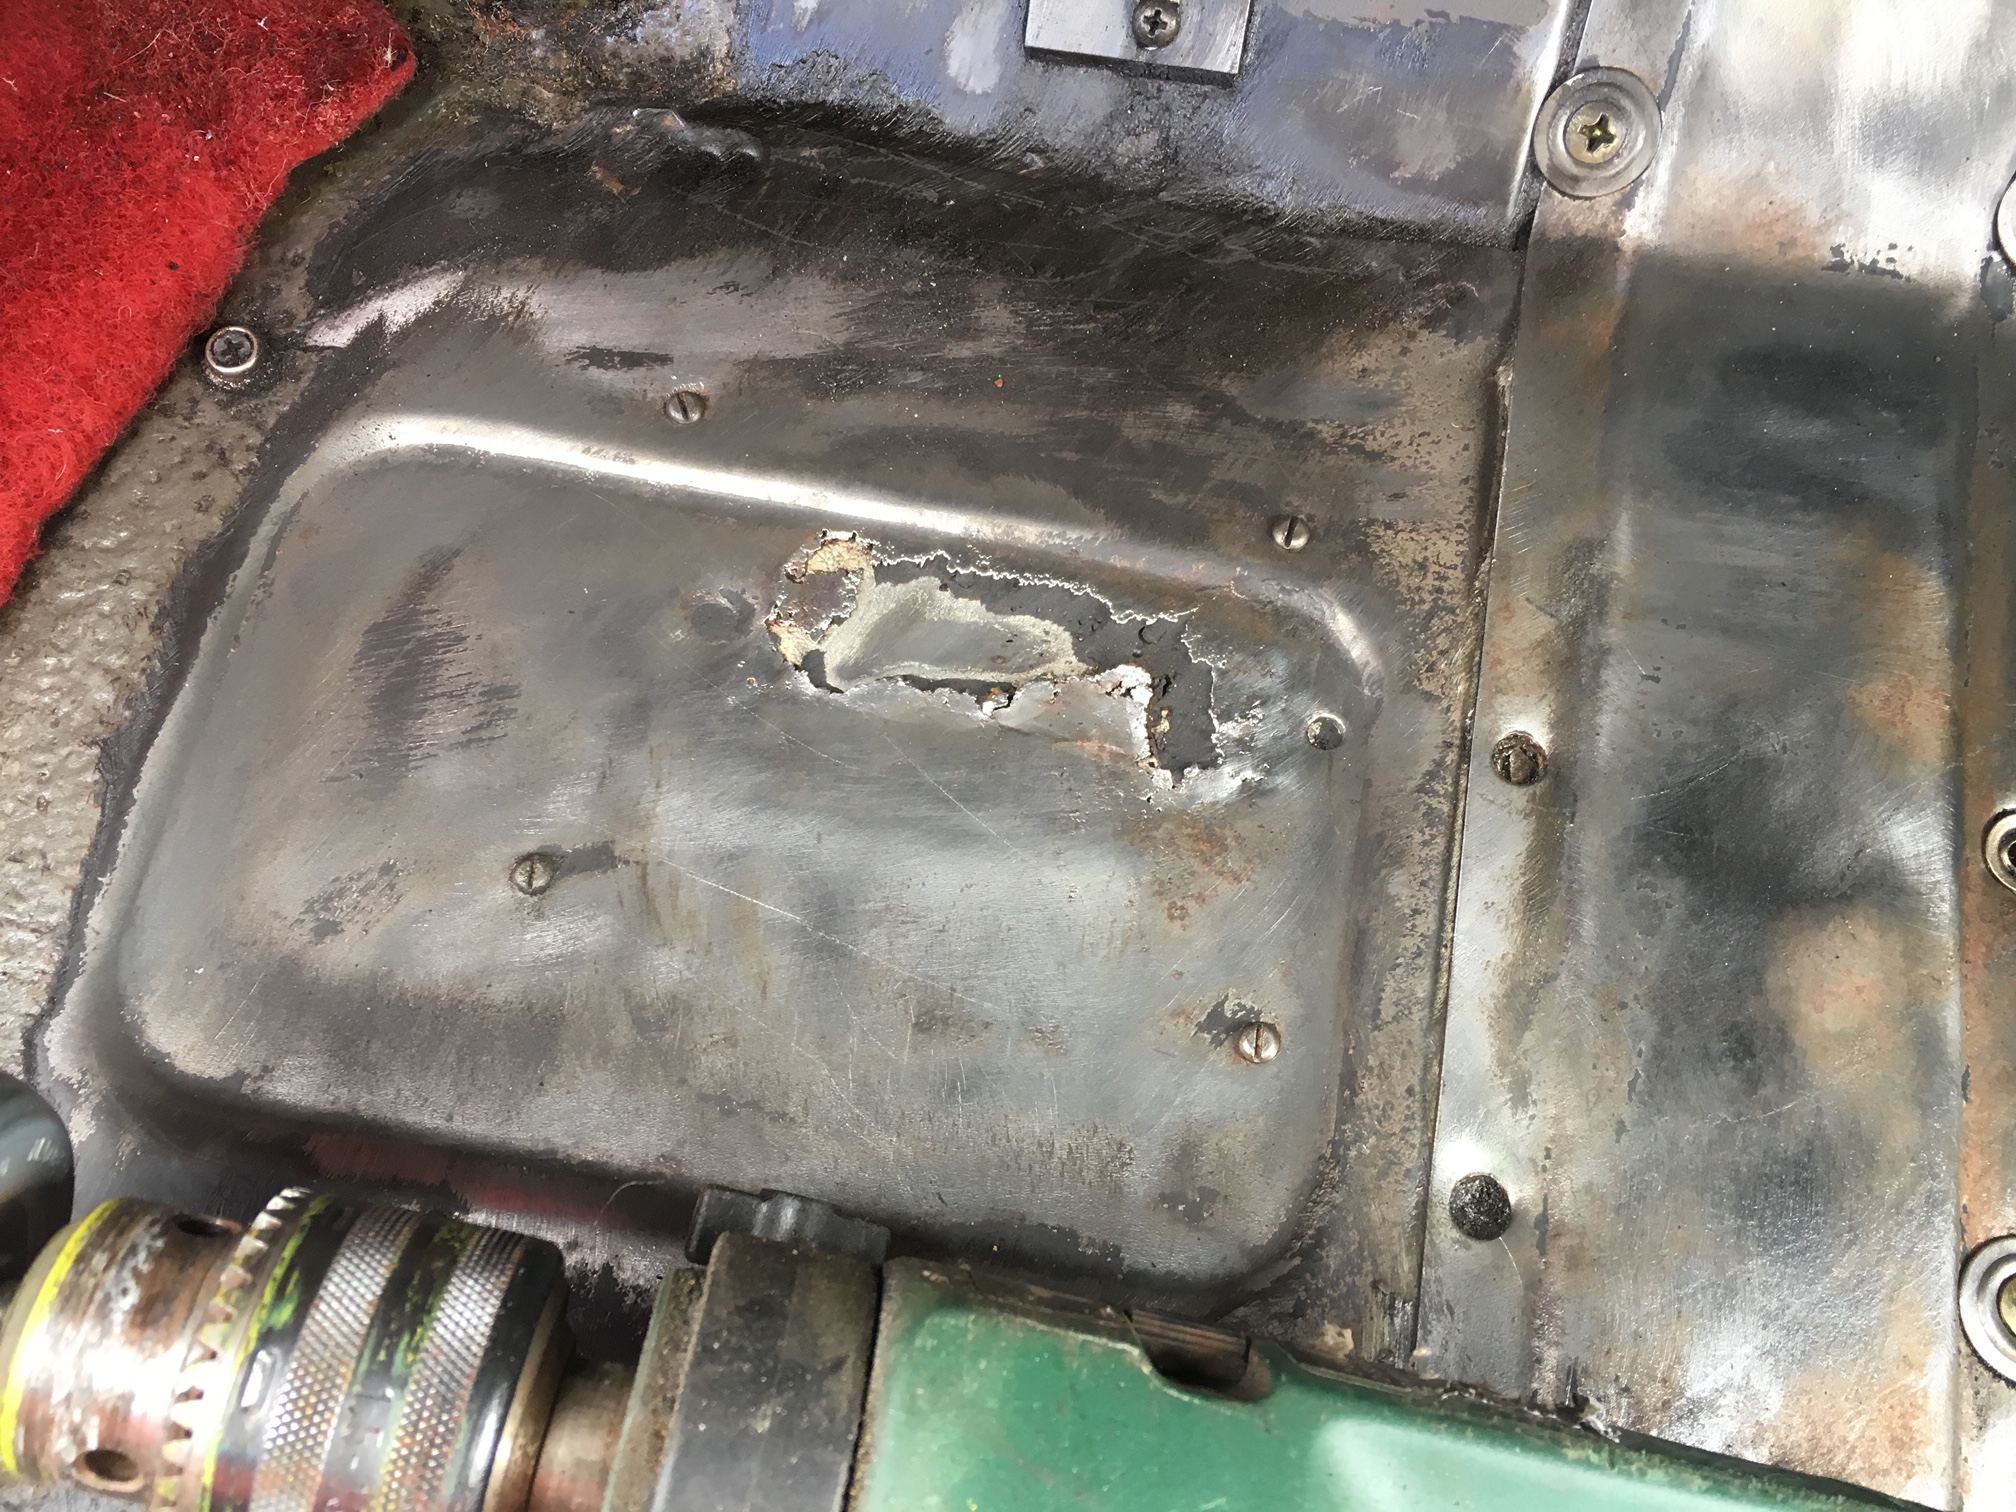
Holes that had been plated over on the underside of the car, with filler on the top side.
Now, this isn’t the worst starting point – the floor wasn’t absolutely shot, but there was a crack in the driver’s side floor that seemed to have been growing stemming from where the seats are affixed, part of the floor had holes that been patched underneath and filled on top, and the corners of the floorpans were crumbling, so I decided that I’d have the whole lot cut out and replaced.
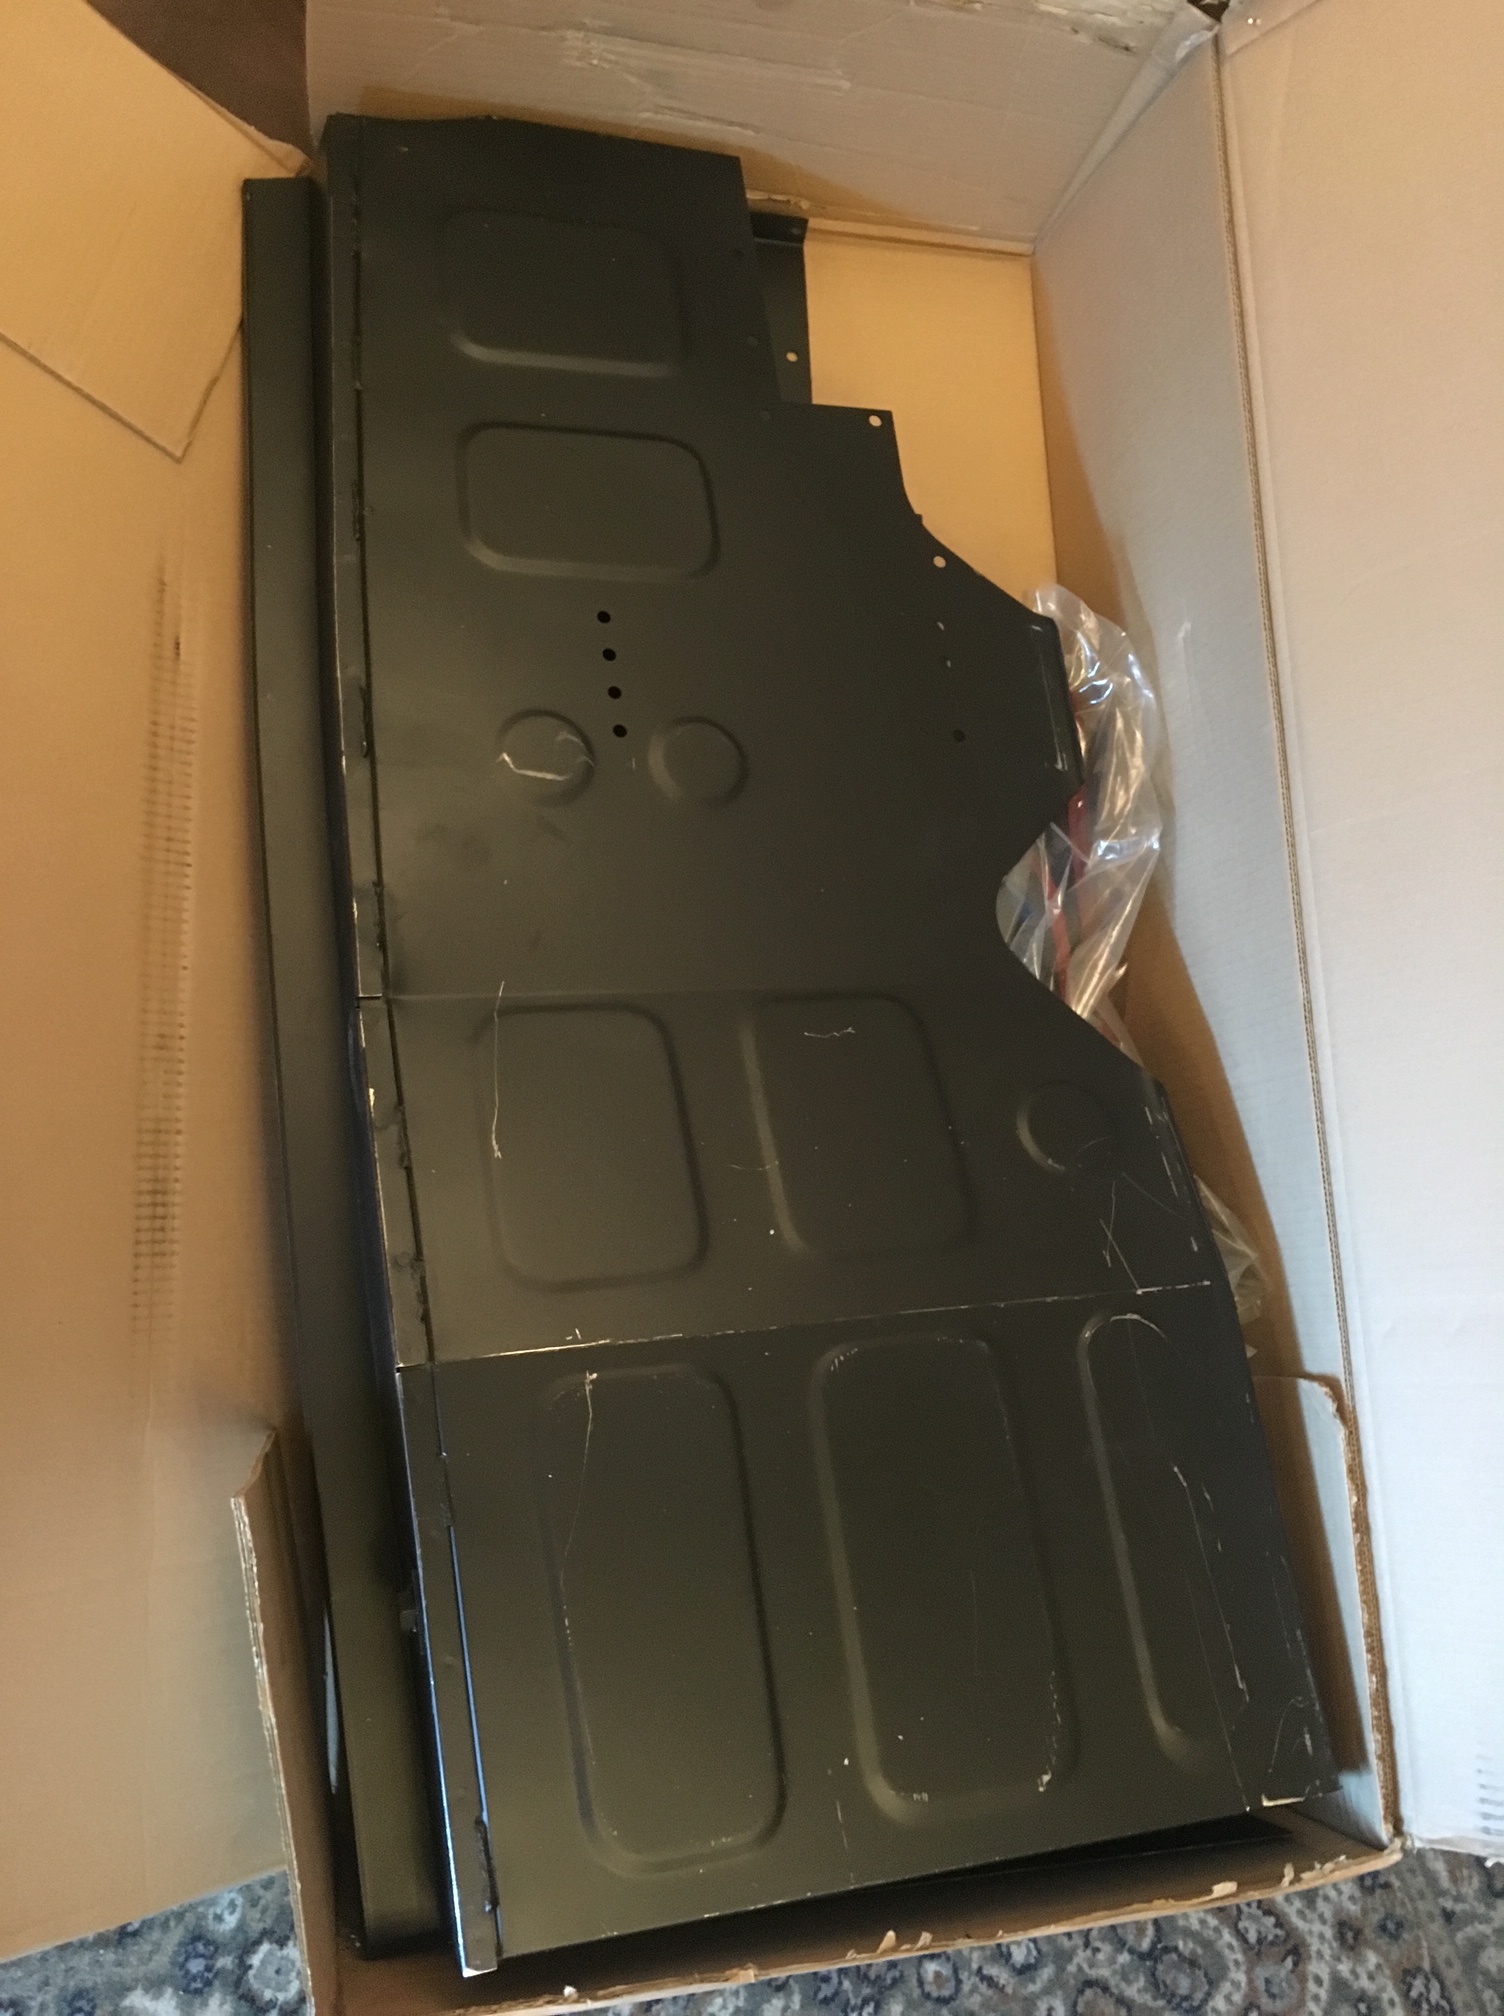
On 8th January 2018 I decided for some reason it’d be cool to go to Boston, Massachusetts. I left my car and new panels with a welder that morning before hurrying to Gatwick Airport to catch an afternoon flight to New England. I enjoyed the getaway, but there isn’t much there for someone who isn’t really into the early history of the USA, and it was very very cold, so it probably wouldn’t be on my list of places to revisit in a hurry.
During the time I was away the welder had repaired some damage he found on the sills and replaced both floor-pans. Sure, there were probably cheaper ways to deal with the holes and filler patches, and I could’ve just had more plates patched on underneath, but the results wouldn’t have been half as satisfying! I intend to keep this car for as long as I can, so it was definitely a worthwhile investment in my eyes.
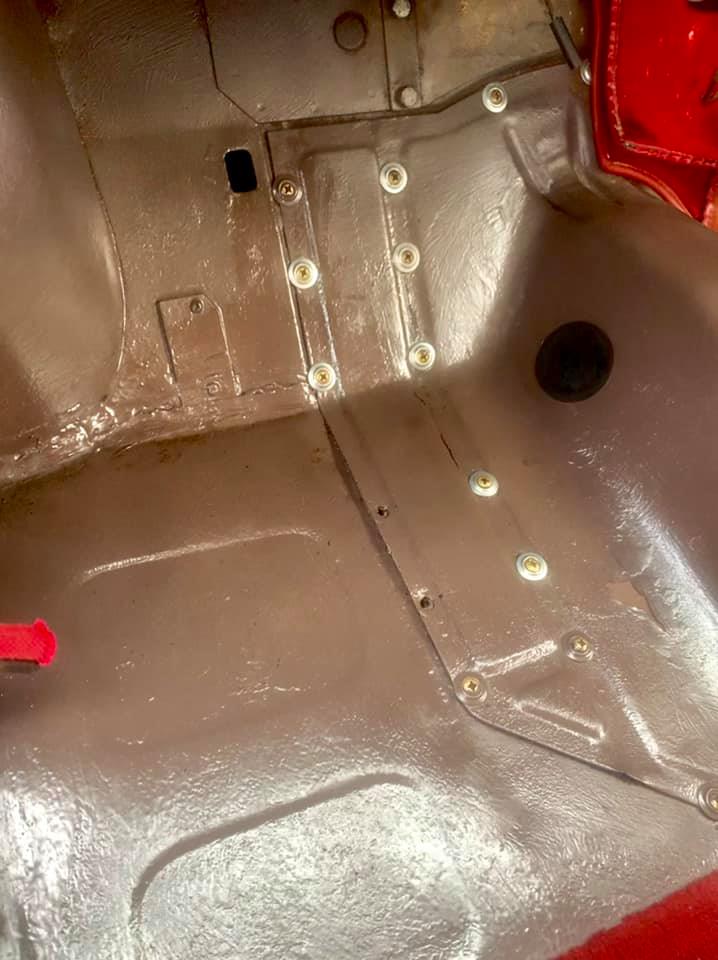
I think you’ll agree that it looks great, and I imagine it adds a bit more strength to the car.
When I got the car back, the inside floor surfaces had been treated with a coat of red oxide paint, which I went over this with a product called Epoxy Mastic 121, which is described as a “two-pack high build primer/finish which can be used on Steel, Aluminium, Galvanised Metal and GRP”.
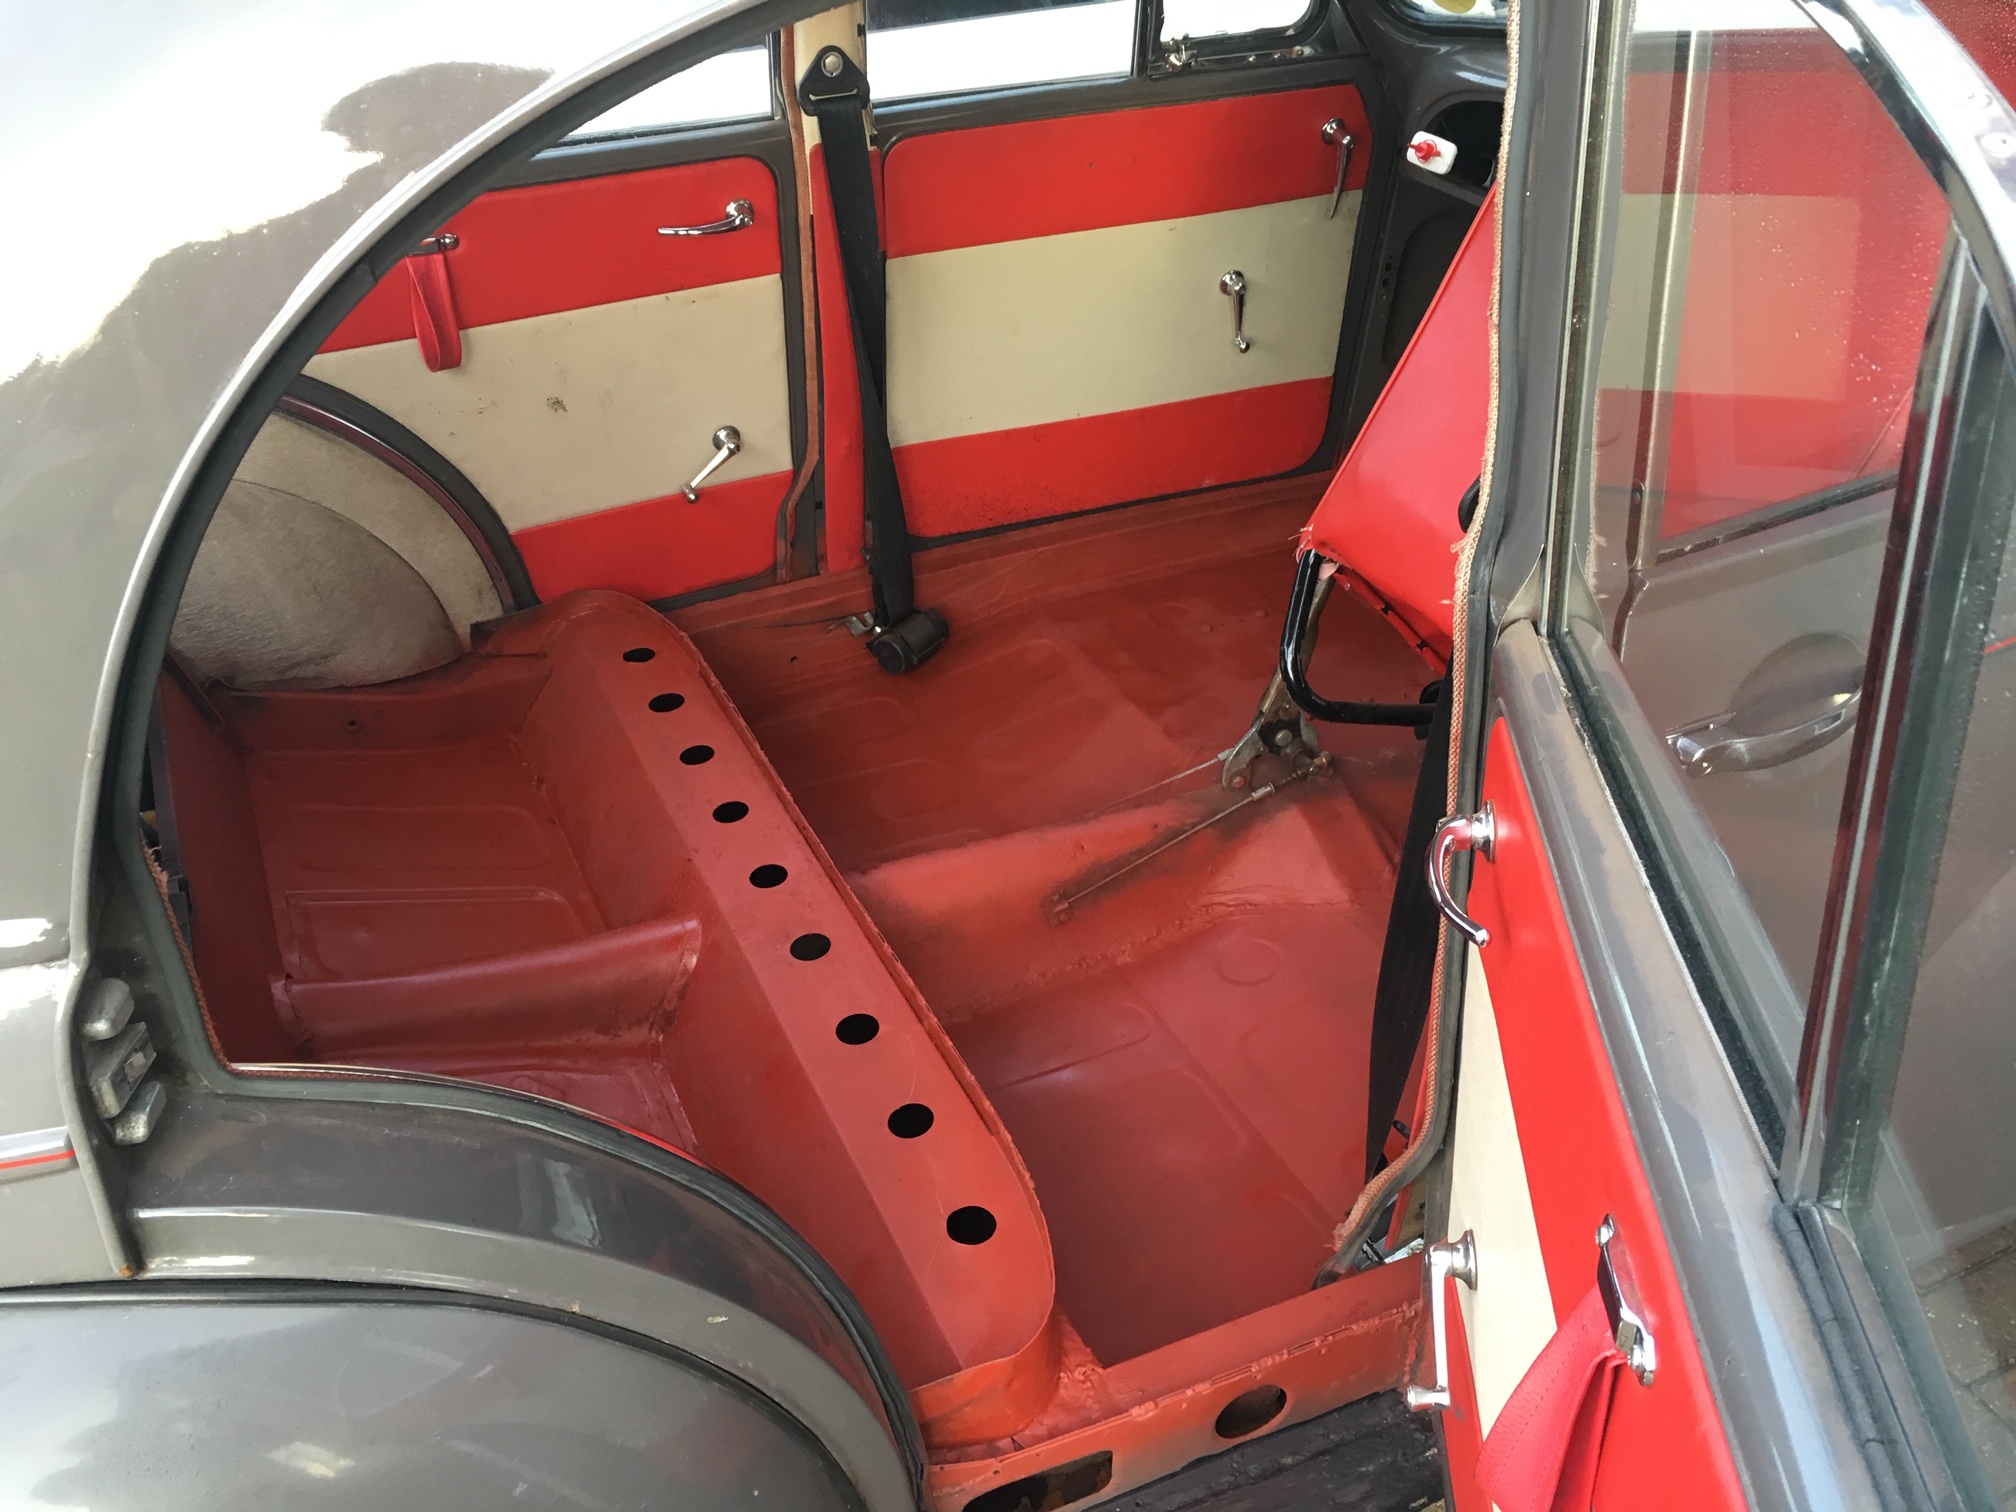
Before: Fresh from the welders! 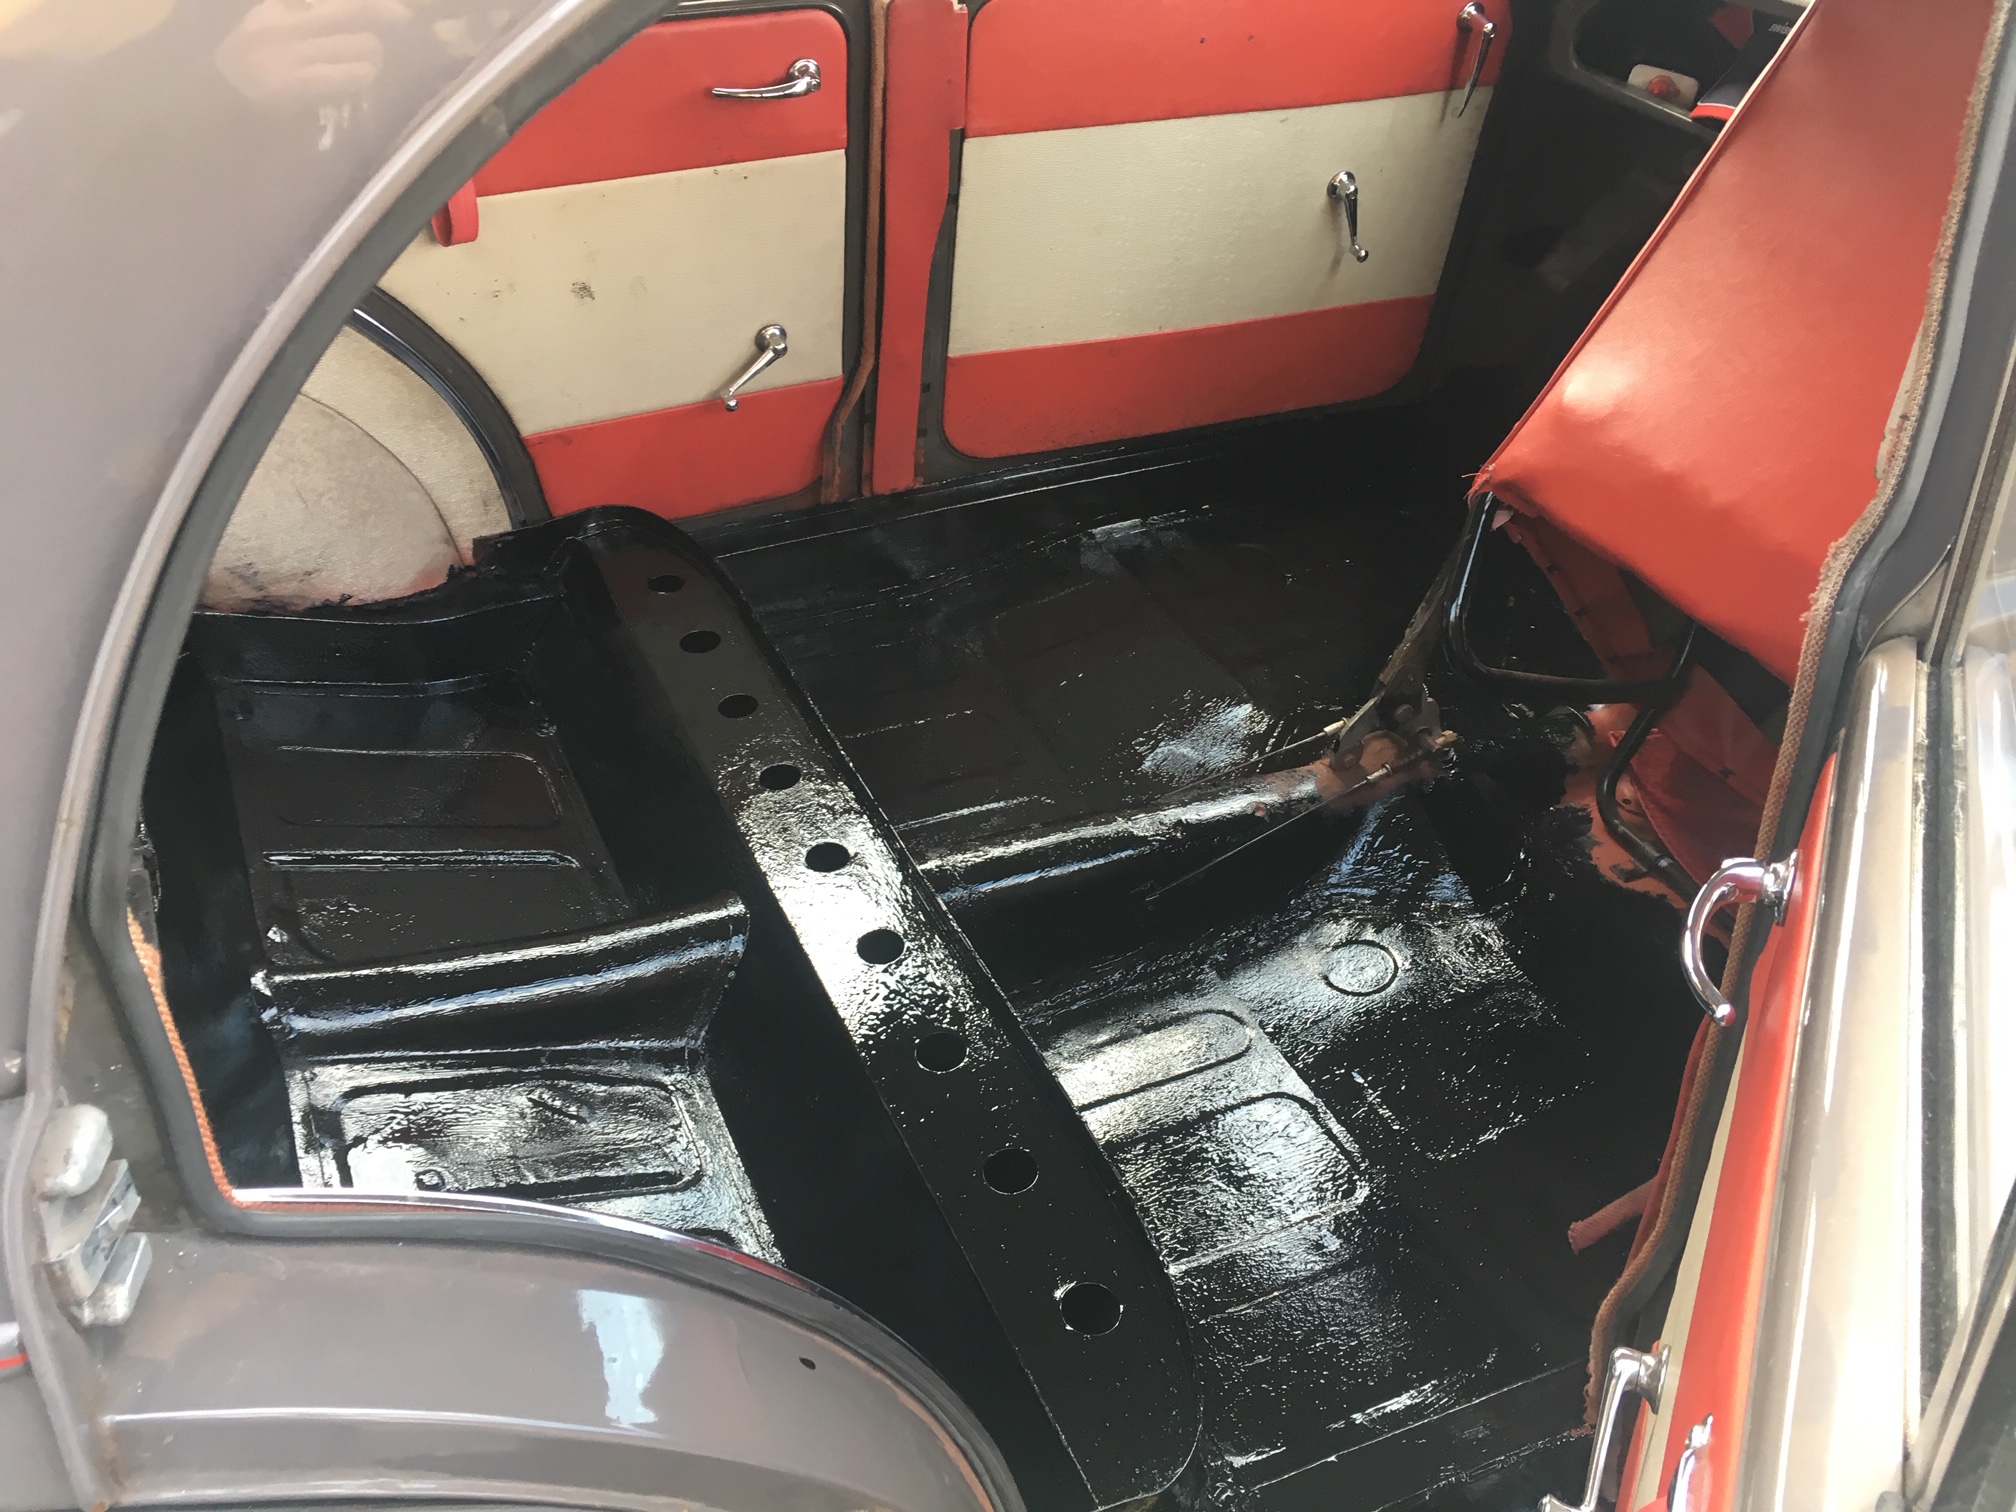
After: Epoxy Mastic 121 applied.
I have since painted over the EM121 with rose taupe paint to match the rest of the car’s colour – it looks fantastic, and it seems to be doing it’s job of protecting the new panels!